【AWS_13】プライベート用サブネットの中に新規インスタンスを作成

今回は、プライベート用サブネットの中にデータベースサーバー用の新規インスタンスを作成していきます。
新規インスタンスの作成
AWSのホームへ移動し、EC2をクリックします。
左ペインより「インスタンス」をクリックします。
右上の「インスタンスを起動」をクリックします。この時点では、まだ以前に作成したWEBサーバーのインスタンスしか存在していません。

名前とタグに「DBサーバー」を入力します。

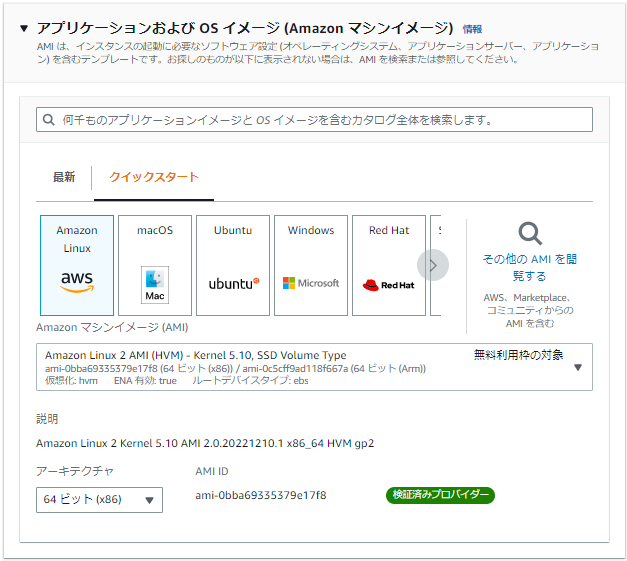
アプリケーションおよびOSイメージ(Amazonマシンイメージ)は、「Amazon Linux」を選択します。
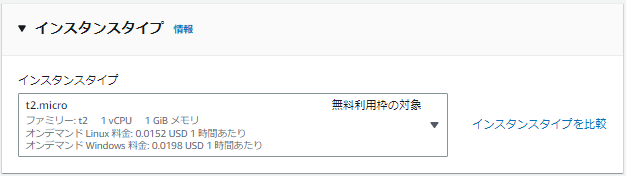
インスタンスタイプは、無料利用枠対象の「t2.micro」を選択します。
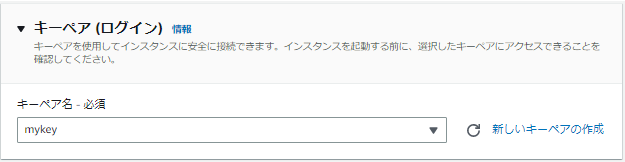
キーペア(ログイン)で以前作成したキーペアの「mykey」を選択します。
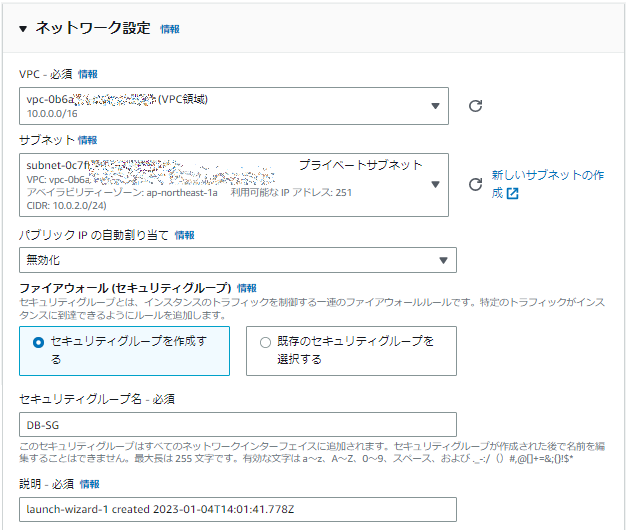
ネットワーク設定で「編集」をクリックします。
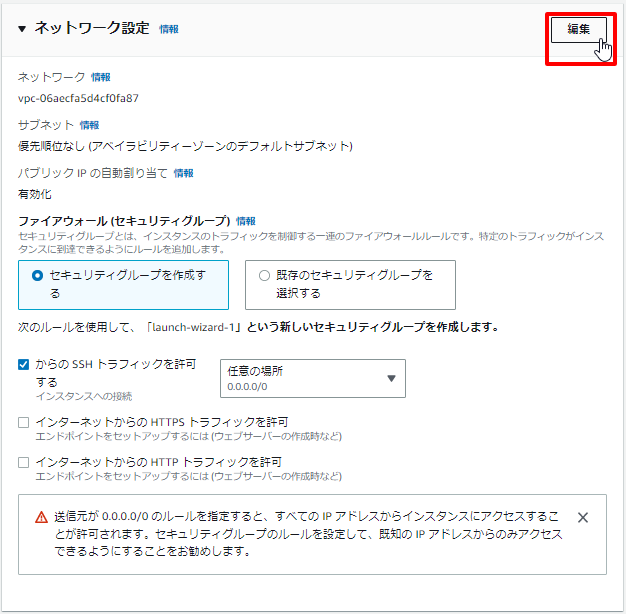
「ネットワーク設定」画面で以下を選択、入力します。※設定変更箇所のみ記載
・VPC ⇒ 作成したVPC領域を選択
・サブネット ⇒ 作成したプライベートサブネットを選択
・パブリックIPの自動割り当て ⇒ 無効化を選択(※外部公開しないため不要です)
・ファイアウォール(セキュリティグループ) ⇒ セキュリティグループを作成するを選択
・セキュリティグループ名 – 必須 ⇒ DB-SGを入力(名前は任意名)
・説明 ⇒ デフォルト設定のまま
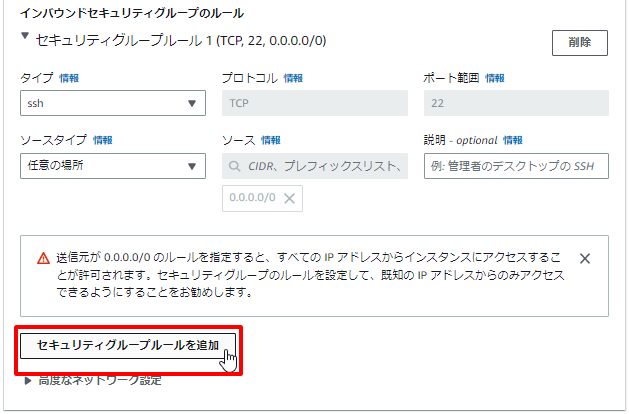
インバウンドセキュリティグループのルールで「セキュリティグループルールを追加」をクリックします。
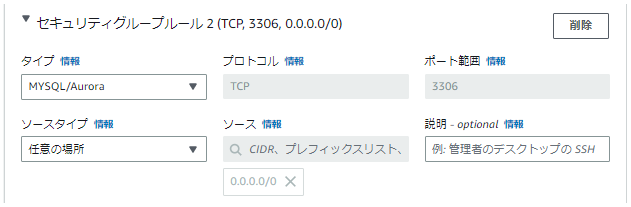
「セキュリティグループルール2」画面で以下を選択、入力します。※設定変更箇所のみ記載
・タイプ ⇒ MYSQL/Auroraを選択
・ソースタイプ ⇒ 任意の場所を選択
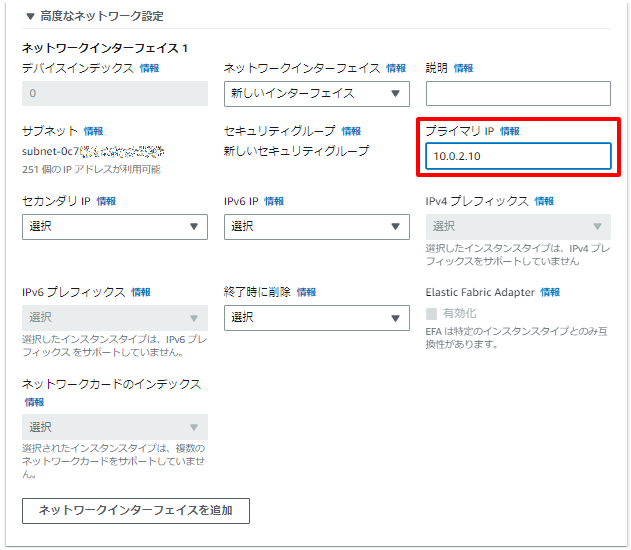
高度なネットワーク設定をクリックして、以下を入力します。※設定変更箇所のみ記載
・プライマリIP ⇒ 10.0.2.10 を入力
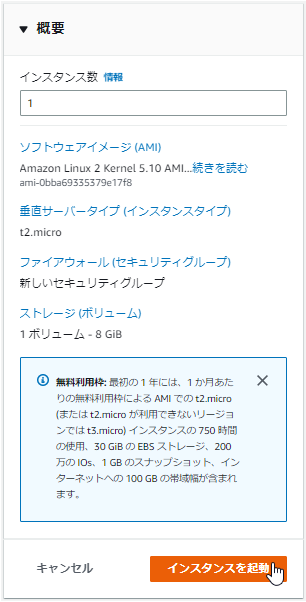
ストレージを設定、高度な詳細は、デフォルト設定のままとします。
画面右側の概要の内容を確認し、「インスタンスを起動」をクリックします。
インスタンスの起動を正常に開始しましたが表示されます。
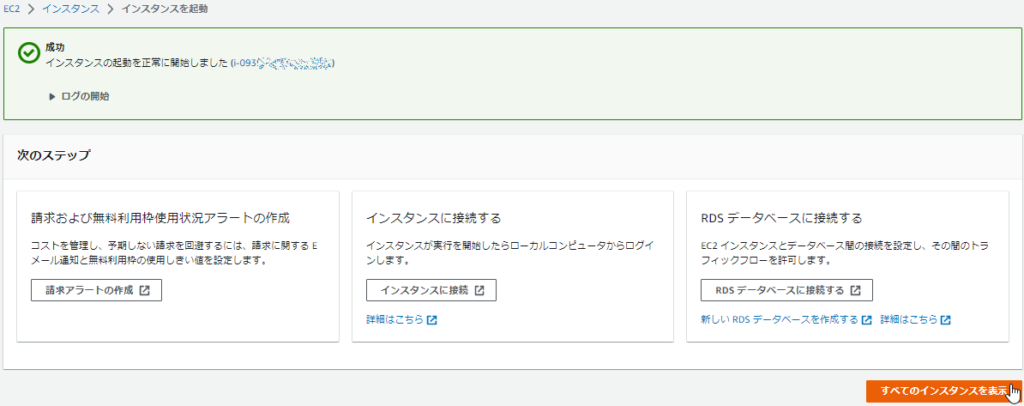
新しいインスタンスである「DBサーバー」が作成されました。

まとめ
今回は、プライベート用サブネットの中に新規インスタンスを作成しました。
次回は、プライベート用サブネットの新規インスタンスへSSHで接続できるよう構成していきます。